Showing posts with label vintage clear stamps. Show all posts

Friday, November 4, 2011

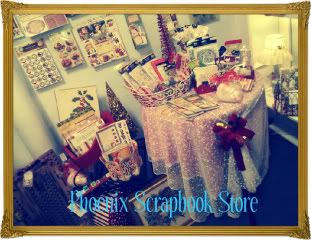
Vintage Clear Stamps available at Phoenix Scrapbook Store


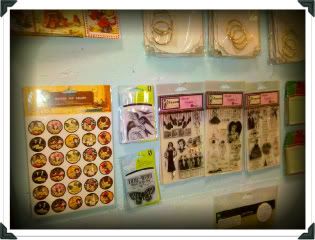
Stampin' D'Amour Clear Vintage ARt Stamps are now available
at Phoenix Scrapbook store, which is located
inside the Brass Armadillo Antique Mall.


Phoenix Scrapbook Store offers a unique selection of Paper Arts,
Vintage Scrapbook supplies, Collage, Vintage Ephemera, and
other fabulous hard to find 12x12 scrapbook paper, etc.
OPEN 9am-9pm everyday!

It's like visiting a Scrapbook show without the cost of admission!

Located at: 12419 N. 28th Dr.
NW of Cactus & I-17
Phoenix, AZ

Wednesday, August 10, 2011

CLEAR STAMPS in STOCK!

Vintage-inspired CLEAR STAMPS are back in stock!
Only $11.95 each!

They stamp a very nice image!
Each sheet is 4" x 6".

They can be found here: SDA CLEAR STAMPS

Shipping is $2.99 (usa)
--------------------------------


Vintage Ladies

*****************************

Vintage Hawaii
"Mahalo!"


French Vintage
Very popular!

Fabulous Birthday!


Vintage Children


Saturday, April 30, 2011

Stampin' D'Amour ATC Tutorial


Welcome to Stampin' D'Amour, today I have a tutorial on how to make this very sparkly and vintage inspired ATC. I used the lady image from the "French Vintage" clear stamp set and the birthday sentiment from "Fabulous Birthday" clear stamp set.

I started by choosing a cream colored patterned paper with a beautiful floral white pattern.

Next I trimmed the patterned paper to match the ATC card size 2 1/2" x 3 1/2" and inked the edges with old paper distress ink.
Inked all the edges and adhered the patterned paper to the ATC piece.

Next, I trimmed a piece of double-sided adhesive to match the ATC size.

I


carefully peeled one side off the adhesive and adhered to the patterned paper.


Once completely adhered to the patterned paper I carefully peeled the top protective paper.

Using a bead or glitter tray, I completely covered the adhesive with micro fine glitter, making sure to shake off all excess glitter.
On a stamping mat (love it, makes a huge difference on your stamped images), I placed my glittered ATC and stamped the vintage lady image with black archival ink.
I then stamped the "Happy Birthday" sentiment using the same ink.
Once everything was stamped, I colored the lady image with a Marvy marker and the blender pen.
I took a piece of adhesive back metal and cut one edge with the scalloped edge scissors.
I adhered the metal to the edge of the ATC, making sure the scalloped edge was placed on the front of the image.
I love the finished look of the cooper metal all around the image, it also protects the edges so the adhesive will not start lifting from the patterned paper. Look at all that sparkle!!!
As a final touch I added some fibers and a button. I hope you enjoyed my little tutorial, thank you so much for stopping by and hope you have a wonderful day.

Supplies:
Size: 2 1/2" x 3/12"
Stamps: Stampin' D'Amour (Fabulous Birthday, French Vintage)
Inks: Ranger Archival Ink (Jet Black), Distress Ink (old paper)
Image Colored With: Marvy LePlum II (13 Ochre, 0 Blender Pen)
Paper: Cardstock, Anna Griffin
Other: Fibers, Crystal Glitter Ritz, Copper adhesive metal tape, PC mini scallop paper shapers, Be Creative double-sided adhesive sheet, button

Saturday, April 16, 2011

Vintage Card...

{Posting by Angelica Turner - BLOG}


I have been super busy working on the yearbook for my daughter's school so when I get a few minutes I use them to get my DT projects done. Today I have a card with a couple of vintage inspired images from Stampin' D'Amour, the dancing couple is from the "French Vintage" set and the sentiment is from the "Fabulous Birthday" set. My color combination is color challenge #23 from CR84FN and my layout is based one sketch #186 from Mojo Monday.

All the black lacy borders were cut with the border die from the Spellbinders' set "Parisian Accents". I used a Sizzix embossing folder to emboss the upper cream colored patterned paper.

The sentiment was stamped on glitter cardstock with black StazOn ink and cut with a circle die from Spellbinders. Also added some tiny adhesive pearls.
I stamped the image on Canson paper with Versafine black ink, inked the edges with tattered rose distress ink and applied some Stickles to the dress. Double matted with black cardstock and cream patterned paper and then added the border. Thanks for taking the time to stop by and hope you have a great weekend.

Supplies:
Size: 5 1/2" x 7 3/4"
Stamps: Stampin' D'Amour (Fabulous Birthday, French Vintage)
Inks: Versafine (Onyx Black), Distress Ink (tattered rose), StazOn (Jet Black)
Paper: Bazzill Cardstock, Canson "Fanboy" drawing paper, DCWV (Mariposa Matstack, glitter paper), Basic Grey (Infuse)
Other: Spellbinders (Standard Circles Large, Classic Scalloped Circles Large, Parisian Accents), ribbon, Stickles (Diamond), scalloped edge deco scissors, black twine, Recollections adhesive pearls, Sizzix embossing folder (Diamond & Damask), pop dots
Challenges: Sketch #186 www.mojomonday.blogspot.com, color challenge #23 www.cr84fncolorchallenge.blogspot.com

Thursday, March 24, 2011

MaRiE in PARIS ATC


Here is a sweet little ATC stamped with several images from the "French Vintage" Clear Stamp Set. This has been a very popular vintage-inspired stamp set, with only ONE left in stock! They have been re-ordered and should be arriving very soon!

If you LOVE vintage clear stamps, I can't wait to show you the two new sets that are currently being worked on! You'll love them! They should be available by late April.

Friday, February 25, 2011

"PaRiS" Mini Canvas Tutorial

{Gorgeous creation & posting by Angelica Turner - BLOG}

~~~~~~~~~~~~~~~~~
Good Morning Friday, hope everyone had a good week and is ready to welcome the weekend. Today I have a little tutorial on making this vintage inspired mini canvas with a stamp from Stampin' D'Amour. I used lots of fun goodies, some feathers, a crochet flower I made a while back, a pin I made with some beads I found in my bead stash, anyways, hope you like the tutorial.

I started by picking 2 acrylic paint colors that would contrast and look good together for the crackle finish.

Start by painting your mini canvas with the burnt umber color acrylic paint, let dry or dry with a heat gun.


Apply a coat of crackle medium and follow instructions on the bottle, mine calls for a nice even coat and let dry until the medium is tacky to the touch.

Apply a coat of contrasting paint, for mine I used this color called bone, I didn't want to wait for the air drying so I used my heat gun to dry the canvas.

Ink edges with walnut stain ink.

Stamp image on cream cardstock with blazing red StazOn ink.

Distress edges with a distress tool, this one is my favorite.

Ink edges of image with walnut stain ink for
that extra distressed look.

Diecut the Spellbinders border from red cardstock.

Cut the border in small sections to make a
frame around the stamped image.

Glue the sections to the image,
make sure to trim the corners of the pieces you are using on the corner.

Here is the final image with the lace border completed.

I mixed some Golden gloss gel medium with
Pearl Ex powder and painted a mulberry rose.

Before the medium dried I put some Diamond Dust on the rose, I love the look this adds to my flowers.

I used a Quickutz die to cut some leaves from glitter cardstock.

Using a embossing tool, I shaped the leaves to give them some dimension.

I ...added some pop dots to the stamped image for dimension.

Adhere a couple of feathers, the crochet flower and painted rose, the leaves. I also made a pin with some beads I had in my stash. As a final touch I added some gold Stickles to the stamped image and the crochet flower.
--------------------------------
Supplies:
Stamps; Stampin' D'Amour (French Vintage)
Inks; StazOn (Blazing Red), Distress Ink (walnut stain)
Paper; Bazzill Cardstock, cream cardstock, DCWV Glitter paper
Other; 4" x 4" Canvas, Stickles (Golden Rod), Quickutz leaves die, Tim Holtz Distressing tool, Spellbinders Classic Lace Border, Wild Orchid Crafts mulberry wild roses 30mm, Pearl Ex (689 Blue Russet), Diamond Dust, Golden Gel Medium (Regular Gel Gloss), Delta Crackle, Acrylic paint
(Burnt Umber, Bone), feathers, handmade crochet flower, pin, beads, pop dots, Cuttlebug Machine.

Wednesday, February 23, 2011

Vintage Typewriter Card...

{Fabulous creation & posting by Jennifer Cuthbertson - BLOG}


Today I'm happy to share with you a card I made using the fabulous Vintage Typewriter stamp from
Stampin' d'Amour! I love the vintage images they have and this one's no exception! I stamped the typewriter image on a manila tag and distressed it by crumpling it over and over (it was really soft when I finished!) and adding a lot of dye ink. I finished the tag with red twine to give it a vintage repair tag feel. I thought the tag would be a great addition to the new Curtain Call collection from Graphic 45 and I finished the card with a couple of red bead accents.

--------------------------------------
Supplies: Stamps - Vintage Typewriter (SDA), DP - Curtain Call Collection (G45), Card Stock - Basic Black (SU!), Ink - Basic Black (SU!), Tea Dye Duo (PTI), Twine (May Arts), Beads (Martha Stewart), Tag (Uline), Corner Chomper

LinkWithin

Related Posts Plugin for WordPress, Blogger...